Tuesday, May 31, 2011

Shepherd's Pie

Our new puppy is awesome! His name is Albus Dumbledog and he is such a sweetheart. We affectionately call him Albie. I'm really hoping his beard grows in as he matures to match his namesake. I am loving all the time I get to spend with him. Today was his first vet appointment and he got a clean bill of health. He goes back on Saturday for his last puppy shots and then he's clear until 4 months :) Between potty training, waking up for him in the middle of the night, and all the fun play times, he has been keeping us pretty busy!

Ear flopped up and enjoying his tiger :)

He passed out again right after this picture. So cute!

Well back to the meat and potatoes...literally. Shepherd's pie is such an easy meal and it's quite filling as it consists of meat and potatoes. It doesn't take too long to make and if time is tight in the evenings its something you can make ahead of time and heat up before serving. I made this for Rex Thursday night so that we could have a nice meal before our class at church. This is one of those recipes that I tend to make up as I go, but I kept tabs on how I made this particular pie as it was probably the best version I've made so far :)

Pre-mashed potatoes.

The end product. Yummy!


INGREDIENTS
1 lb ground beef
1/2 onion diced
3 carrots peeled and chopped
1 cube beef bouillon
1 tbsp flour
1/4 c water
4-5 medium sized potatoes
2 tbsp cream cheese
1 tbsp butter
1/4 c cheddar cheese shredded
1 small pinch of salt

DIRECTIONS
1. Preheat oven to 350 degrees Fahrenheit.
2. Peel and cut potatoes. Add to boiling water for 15 minutes or until soft.
3. In the meantime, fry ground beef in pan with onion. When meat is no longer pink, add water, bouillon cube, and carrots.
4. Once carrots are soft, add the flour to thicken up the meat mixture. Put meat in a 8x8 dish to be baked.
5. Drain and mash the potatoes to desired consistency. Add cream cheese, butter, salt, and cheese. Mix well.
6. Evenly spread potatoes over meat mixture and bake in oven for 20-30 minutes until cheese is melted and the entire pie is uniformly warm.

Friday, May 27, 2011

Grilled Cheese

No, I'm not going to tell you how to make a grilled cheese :) I just wanted to share the recent experience I had while making grilled cheese. It was the day I had gotten home from the doctor and feeling pretty crummy I decided to keep it simple for dinner. Grilled cheese and soup were on the menu. I began making the soup earlier in the day and allowing it to simmer, so when Rex came home I could pop on the grilled cheese and be done with cooking. By the time I wanted to start the grilled cheese, I grabbed my bread and *gasp* it was all green! Oops! I guess I should have checked the bread ahead of time. Fortunately earlier in the week I had made honey grain bread in the breadmaker. With a little slicing, some butter, and American singles we were still able to have some delicious grilled cheese. We even preferred the bread to the store bought kind as it was thicker and heavier. We've been going through our flour and sugar so much recently with making virtually everything from scratch that I think I need to come up with some more storage solutions for my pantry.

Here's a picture of frying up our delicious grilled cheese:


Speaking of expanding, Rex and I just adopted a puppy from the humane society. I actually get to pick him up today from the vet hospital after he's "altered". He's a small terrier that's only 2 months old. Since he's so little we really aren't sure what kind of terrier he is actually, but he is a playful little guy who loves to cuddle :) And his name- Albus Dumbledog :) We are going to affectionately call him Albie. I'll have pics to post of him later.

Thursday, May 26, 2011

Fried Chicken

These past few weeks have been a whirlwind. My cold decided to turn itself into a sinus infection which is actually quite painful! Rex has been so busy that he hasn't been home for dinner at least 2-3 nights a week for the past 2 weeks, so dinner hasn't been going quite as planned. Last Saturday, I wanted to make fried chicken but due to a late lunch, I postponed frying until Sunday. Little did I know I would only sleep 2 hours Saturday night (or shall I call it Sunday morning!). Let's just say taking Sudafed at 3pm is a bad idea. I slept from 7 am to 9 am on Sunday and went to the main service at church. Afterwards, we ate lunch, went to see Thor, and came home to fry some chicken.

I actually like frying things in oil with a pot or wok. It's pretty fun and everything tastes better fried :) I enlisted Rex's help since I was still in sleep deprivation mode. I used a recipe I randomly found on a website that happened to show my favorite chef Curtis Stone. By favorite, of course, I mean that he is the only chef I can watch on Netflix Instant Streaming.


Rex and I really enjoyed the recipe. It tasted great and we'll definitely be using it again whenever we get a fried chicken craving :)

Deep frying in the Wok with my trusty candy thermometer

The Result: Crispy fried chicken and creamed corn
INGREDIENTS:

4 tsp salt divided
1 whole chicken (4 lbs) backbone removed chicken cut into 8 pieces
3 c buttermilk
6 c canola oil for frying
2 c all-purpose flour
1.5 tbps dry mustard
1.5 tbsp paprika
1 tbsp garlic powder
1 tbsp onion powder
1 tsp ground pepper
3 lg eggs
2 tbsp water

DIRECTIONS
    
1. Massage 1 1/2 teaspoons of the salt into the chicken pieces.
2. Combine the chicken pieces and buttermilk in a large bowl or large shallow dish and turn the chicken pieces to ensure they are completely coated with the buttermilk.
3. Cover with plastic and refrigerate for at least 2 hours and up to 1 day.
4. Preheat the oven to 300°F. Add enough oil to fill a large wok about halfway. Heat the oil over medium-high heat until it registers 350°F to 375°F on a deep-fry thermometer.
5. Stir the flour dry mustard paprika garlic powder onion powder pepper and 2 teaspoons of salt in a shallow dish to blend.
6. Whisk the eggs and water in a medium bowl to blend.
7. Working with one chicken piece at a time lift the chicken from the marinade allowing any excess marinade to drip back into the dish then dredge the chicken pieces in the flour mixture to coat completely.
8. Dredge the flour-coated chicken pieces in the egg wash.
9. Dredge the coated chicken in the flour mixture again to coat completely.
To Fry the Chicken:
10. Working in 2 to 3 batches carefully place the coated chicken pieces into the hot oil and cook for about 12 minutes turning as needed until they are golden and almost cooked through.
11. Using a skimmer transfer the chicken pieces to a rack set on a baking sheet to drain any excess oil.
12. Bake for about 10 minutes or until the chicken pieces are cooked through but still moist and juicy. Sprinkle with the remaining salt and serve.

Friday, May 20, 2011

Chocolate Chip Cookies!

So, I really enjoy baking cookies. I especially love making all the traditional cookies that my mom would bake around Christmas time. In fact, this past Christmas was the first year I was not living at home on school breaks and so I needed to jot down every cookie recipe so I could make it a tradition in our own family! Well, my Christmas cookies are tried and true. They come out great every time without fail. My chocolate chip cookies (the most basic of recipes) always turn out flat! Since Rex was working late (he came home at 8:30!), I decided I would make him a batch of chocolate chip cookies for when he arrived home. Well, as usual they came out pretty flat. The taste is great, but I want great taste AND great consistency. So, with a quick google search I found a remedy to my problem. Apparently if your dough is refrigerated, the cookie will not spread as fast on the cookie sheet while baking causing it to be puffier. So for years of messing up the most basic of recipes, I have hopefully found a cure to my chocolate chip cookie flaw. Yay! I may have to make another batch next week, but for proof of my failed work, here are my flat cookies before and after.


I'm a cram and jam type baker. I can't let 2 cookies be wasted or make another cookie sheet for a measly 2 cookies!

Looking like pancakes :( Well, next time refrigerate the dough!

Classic Nestle Tollhouse Recipe:

*making your own brown sugar makes cookies taste that much better! It's easy just add 1 tbsp molasses (2 tbsp if you need dark brown sugar) to 1 cup white sugar and mix with a fork until well combined. Be sure to note that when baking you need to remove 1 tbsp of liquid to compensate for the molasses being added (I usually just reduce the butter in the recipe).

INGREDIENTS
2 1/4 c all-purpose flour
1 tsp baking soda
1 tsp salt
1/2 c butter
1/2 c shortening
3/4 c sugar
3/4 c packed brown sugar
1 tsp vanilla extract
2 lg eggs
1 (12 oz) pkg semi-sweet morsels
1 c chopped nuts (optional)

DIRECTIONS:
1. Preheat oven to 375 degrees F.
2. Combine flour, baking soda and salt in small bowl. Beat butter, shortening, granulated sugar, brown sugar and vanilla extract in large mixer bowl until creamy. Add eggs one at a time, beating well after each addition. Gradually beat in flour mixture. Stir in morsels and nuts. Drop by rounded tablespoon onto ungreased baking sheets.
3. Bake for 9 to 11 minutes or until golden brown. Cool on baking sheets for 2 minutes; remove to wire racks to cool completely.

Thursday, May 19, 2011

Tomato Basil Soup

Last night I was on my own as Rex was practicing drums for our church's Men's Conference this upcoming weekend. I decided to keep it simple and just make a bowl of soup. My sinuses haven't cleared yet, so having soup this week for lunch has been a given. In fact, Rex loves egg-drop soup which is egg dropped into a Soup Secrets noodle soup with added noodles. Since he stayed home on Monday to get better, he made egg drop soup for me. When he cracked the egg, there were 2 yolks! Little chicken-twins...lol. I had never seen it before but we were quite amused with the phenomena.


In Socal we've been having unusually gloomy and rainy weather in May and so soup has been a good treat. I love all kinds of soup from split pea soup to minestrone. But rainy weather always makes me think of tomato with grilled cheese. I didn't end up making a grilled cheese last night, because Rex made dinner croissants using his new bread machine, so I've been on carbohydrate overload for a couple days now :)

Tomato soup is so easy to make as long as you have the right ingredients on hand. And homemade tomato soup is so much better than anything you can buy out of the can. A lot of homemade soups need to be "mushified" with a little help from the blender.


And with the help of the blender the soup is finished. The final product, tomato basil soup!


INGREDIENTS (2 servings)

1 can whole, peeled tomatoes
1 equal "can-ful" of milk
1 tbsp dried basil
1 bay leaf
1 tsp garlic powder
1 tsp onion powder

1. Combine all ingredients in pot and bring to boil. Cover pot and reduce to a simmer for about 20-30 mins.
2. Remove bay leaf and pour into blender. Blend soup until smooth (30 seconds on liquefy). Pour and enjoy!

Tuesday, May 17, 2011

Back into it!

Saturday was Rex's birthday. We celebrated with a homemade dinner and cake prepared for him. The majority of his family was able to come celebrate. Unfortunately we've still been battling this nasty cold. Saturday morning I woke early to prepare a cake while he practiced his drums at church. It was a coconut cream cake with coconut whipped cream frosting. Rich and yummy! After finishing the cake I took a break until he came home. Not having a strong voice and still feeling tired we rested most of his day. For his gift, I bought him a bread-machine. So making bread for the company that evening was a pretty fun task :) 

For dinner I prepared sirloin and mushrooms in a red-wine tomato sauce with garlic mashed potatoes and Raspberry vinaigrette salad. Although Rex doesn't normally enjoy salads, he likes this particular salad because and I quote "it tastes like candy." I forgot to take pictures, mainly because I was still in that sick fog, but I still want to include the main course recipe :) Hopefully I'll finally kick this cold by tomorrow so I can start cooking up a storm again in our kitchen!

RED WINE SAUCE SIRLOIN AND MUSHROOMS

Ingredients
2 lbs sirloin cut into bite-sized pieces
4 cloves garlic, minced
2 tbsp olive oil
16 oz. mushrooms, sliced
1-1.5 c Cabernet or cooking sherry
16 oz tomato sauce
1 tbsp thyme
3 bay leaves

Directions
1. In a large skillet, cook sirloin and garlic in oil until meat is well-browned.
2. Add mushrooms and cook until tender. Add wine, tomato paste, thyme, and bay leaves. Cover and simmer for 30-40 minutes.
3. Remove bay leaves and serve over noodles or mashed potatoes.

Saturday, May 14, 2011

Spaghetti

Onion powder, garlic powder, carrots, bell pepper, zucchini, tomato sauce, and whole, peeled tomatoes 

Spaghetti is a childhood favorite and I'm pretty sure everyone knows how to make spaghetti from the time they were old enough to boil water. I love spaghetti and I especially love its versatility. I think I can confidently say that no two spaghetti sauces I make taste the same. I don't have a set recipe, I just toss things into a pot and let it simmer for 1-2 hours and finito! I almost always make a meat sauce, so I start by cooking my meat in a pot that can hold sauce. Then I drain the meat of any excess oil (yea, I buy the cheap stuff and I'm not ashamed...lol). Then I add my 2 cans of whole, peeled tomatoes w/ one small can of tomato sauce along with whatever veggies I want to throw into the pot along with a little oregano and basil. Bring the pot to a boil with the cover on it and then simmer for a couple hours. Sometimes the veggies water down my sauce so I have to add a tbsp of flour. Since nothing I add is measured and I vary the vegetables quite a bit from sauce to sauce you can imagine the variety my spaghetti becomes. Nothing goes to waste though! I freeze any amount I do not use or will not use throughout the week.

Really, nothing goes to waste. My extra bit of zucchini for Bissel
Even my fish gets to enjoy the leftover veggies. He loves zucchini and cucumber.

The finished product.


Friday, May 13, 2011

Sausage and Veggie Marinara over Polenta

I have been wanting to make polenta for some time, but have refrained from doing so as I never had the cornmeal on hand. Then I really wanted to make cornbread, but didn't have the cornmeal on hand. Hmmm...common problem = common solution! Buy cornmeal. So I went to my trusty Winco bin of cornmeal and bought a good 4-5 cups of cornmeal at $0.40/lb about a month ago. I never did make my cornbread. But I did surrender my recipe to Rex and he made it last Sunday. With my pantry stocked I finally got to make polenta yesterday. Of course polenta by itself is bland-city so I had to spice up the topping a bit with some good Italian-esque flavors. I chose Italian sausage, marinara, mushrooms, carrots, bell pepper, and snap peas. This was then topped with Parmesan cheese. It was good and it was Rex's first exposure to polenta. I really wanted to make a creamy and cheesy polenta, but I opted for traditional for Rex's first time eating it. It was a great meal and I can't wait to start munching on the leftovers.

Of course, my Wok made another appearance (seriously I do use that pan at least 3x a week).

Mushrooms + a frozen pack of stir-fry veggies (I cheated a little!) and sausage.
I usually love making a good tomato sauce from scratch. I buy big cans of whole tomatoes and add a little can of tomato sauce, however, last night we had plans to go to a study on reading/teaching the bible in an expository manner at church. This led to short cuts being taken and it was still just as great :) Sometimes it's easier to cheat and helps with a time crunch. Even though we wound up having plenty of time to make it to our study, it was a nice break from dicing veggies. The meal was easy and probably took me about 20 mins total (not counting the 1 hour break while the polenta cooled). Here was our meal last night:

There is polenta under there, I promise!
INGREDIENTS
1 lb hot Italian sausage
1 pkg fresh mushrooms
1 pkg frozen veggies (your choice!)
1 jar Pasta Sauce w/ garlic (adding oregano and basil to taste)
Parmesan to taste

Polenta
3 c water
1 c cornmeal

DIRECTIONS
1. Boil 2 c water. Using 1 c cold water, mix 1 c cornmeal and stir. Add this mixture to the boiling water slowly, stirring constantly as you add. Once thick, remove from heat. Put polenta on saran wrap and roll into a cylinder to refrigerate 1 hour.
2. Begin simmering your pasta sauce, adding oregano and basil to taste. Allow simmering to take place for at least 30 minutes (but honestly the longer the better!)
3. Once polenta is cool enough, turn on broiler and slice polenta in half lengthwise and then widthwise (picture a garlic bread loaf cut into pieces) and place on a greased cookie sheet. Place in broiler, 5 mins per side)
4. Remove sausage from casing a fry in a skillet or Wok. Once cooked, add vegetables. Cover and allow vegetables to steam for 2-4 mins.
5. Put one serving of polenta on plate, add marinara and sausage mixture. Top with Parmesan and serve.


Thursday, May 12, 2011

Orange Chicken

I really have needed to go grocery shopping for a few days, but between being sick and not knowing what to cook for Rex's birthday this weekend I have avoided it. Yesterday I really wasn't sure what I would make for dinner. I knew I didn't have a lot of ingredients, so I hunted for a good recipe with the things I still had in the freezer. I buy 2 packs of frozen chicken thighs at a time to use throughout the month and luckily I had just enough to make a decent-sized meal out of it. Through my search of chicken recipes I found orange chicken. Who doesn't love orange chicken? The recipe was for a non-breaded version of the Chinese takeout favorite and I figured it was worth a try. A quick glance through the ingredient list made me a little bummed that I didn't have Chinese five-spice powder on hand so I learned what each of the spices were and what they tasted like to make my own version of it.

Some may know, but I think juice tastes pretty good, however, you will almost never find juice in my refrigerator. It really isn't healthy for you, and I'd rather drink water or iced tea than the slightly better equivalent to soda. If I am visiting a friend I may have a cup of juice, but I treat it as if I were to drink a soda which are occasional drinks, not something to have on hand each day. So when the recipe called for OJ, I thought hmmm...I don't want to run out and buy OJ just for this recipe. Then I remembered that I still had oranges in my fridge. So I got to juice the orange the way my grandma always made OJ when were little. I even got to use her same juicer that I inherited among many of her other belongings.


I seriously love that juicer. It may be old and plastic-y but it does the job its designed to do and that's all I need :) Rex and I ate up the orange chicken. It was great and I highly recommend the recipe. If you don't like spice than just reduce the cayenne! Next time I think I'm going to attempt to bread the chicken and use the sauce as a glaze.

Orange Chicken over steamed rice
INGREDIENTS:

1/3 c warm water
1/4 c brown sugar
2 tbsp orange juice
2 tbsp soy sauce
2 tbsp ketchup
1 tbsp white vinegar
4 cloves garlic, minced
1/2 tsp cayenne pepper
1/4 tsp Chinese five-spice powder*
1 tsp grated orange peel
2 tbsp olive oil
1.5 lbs skinless, chicken thigh or breast, cubed

2 c water
1 c uncooked rice

2 tsp cornstarch
2 tbsp cold water

* Chinese five-spice: equal parts tarragon, clove, cinnamon, fennel or coriander, and cayenne

DIRECTIONS

1. In a bowl, stir together warm water, brown sugar, OJ, soy sauce, ketchup, white vinegar, garlic, cayenne, five-spice powder or the alternative, and orange peel until the sugar has dissolved and is well combined.
2. Heat olive oil in skillet or Wok and cook chicken until the outside is golden brown and inside is no longer pink (10-12 mins). Pour sauce over chicken and bring to a boil. Reduce heat to simmer and cover skillet/Wok for 20-30 mins, stirring occasionally.
3. While the chicken and sauce are simmering, bring the rice and water to a boil in a saucepan over high heat. Reduce heat to medium-low, cover, and simmer until the rice is tender, and the the liquid has been absorbed (20-25 mins). Set rice aside and keep warm.
4. Whisk the cornstarch and 2 tbsp of cold water in a small bowl until smooth, and stir into the chicken and sauce, a few tsp at a time. Let the chicken and sauce cook for another 2 mins to thicken, then serve over rice.

  • adapted from allrecipes.com


Wednesday, May 11, 2011

Spicy Broccoli Beef

Phew. I'm feeling so much better today. I was sick yesterday and having not been sick for over a year I didn't remember what it felt like! I think I was getting sick Saturday and somehow didn't realize until Monday night that my sore throat was not me losing my voice from a busy weekend, but was actually me coming down with something. My voice isn't totally back yet, but I can think clearly again, so that is wonderful news :) Anyways, Spicy Broccoli Beef is what I made Monday night. Last night we had frozen pizza since I was sick, but I don't think I'll be posting about how to prepare a frozen pizza :)

In the kitchen I think my most loved pan is my Wok. I try to prepare just about every kind of meal utilizing that great kitchen accessory. I think the best part of owning a Wok is that it makes dinner in under 30 mins. In fact the most time consuming part of preparing a meal in a Wok is typically chopping everything into bite sized pieces. Well that's simple enough!

In our household we gravitate toward food that is a bit spicier with an Asian influence. I shop the Asian aisles at the grocery store and I am always amused at the items they have there. Most I can't read and of the ones I can read I have no idea how to prepare them :) It's inspiring to try to find a way to cook with mystery ingredients. I usually cook meat and veggies in the Wok and then toss over rice with a sauce, but lately I've been enjoying tossing noodles into the Wok with my cooked meat and veggies.

Before I chopped the meat

Post meat choppage (yes that is a word; don't trust the dictionary)
Broccoli beef is a typical Asian dish, and I love to give the meat a little zing :) Please don't make this recipe if you cannot handle even a little spice! The best thing to do with the meat is to marinate it in either a piece of tupperware or ziploc bag. Then make another batch of sauce to pour over the meat prior to serving. When putting meat over rice, the sauce will remain for lack of a better term- saucy. When putting meat over noodles, the noodles tend to absorb all the sauce and really spice up the noodles but you will have a drier meal. Either way is delicious.

The leftovers.


INGREDIENTS:

Sauce
8 tbsp water
4 tbsp ketchup
2 tbsp soy sauce
4 tsp cornstarch
2 tsp honey
1 tsp cayenne pepper
1/2 tsp ground ginger

1 tbsp olive oil
4 cloves of minced garlic
1 head of broccoli (frozen can work if you are in a pinch)
1 lb sirloin or beef chuck cut into bite-sized pieces
1 pkg ramen or chuka soba noodles

DIRECTIONS:
1. Combine sauce ingredients together in bowl. Divide sauce in half and marinate beef in ziploc baggy for 1 hour.
2. Heat 1 tbsp of olive oil in Wok or large skillet. Add beef and garlic into skillet and cook until beef is almost done. Add broccoli and put lid over Wok or skillet to steam the broccoli. Remove lid after 2-3 minutes (broccoli will appear bright green).
3. In the meantime prepare noodles as directed. My noodles needed to be boiled for 5 minutes prior to adding them to the broccoli beef mixture.
4.. Combine noodles and beef mixture in Wok or skillet and pour remainder of sauce over mixture. Heat sauce to a warm temperature. Remove from heat and serve.


Monday, May 9, 2011

Chicken Alfredo- Cream Cheese Style

Sorry for my long absence, we had a family wedding to attend and family in town. It was a great weekend and I'm exhausted coming back into the real world, but it was worth it. I still had the opportunity to make some home-cooking. Last night I made salad w/ creamy Italian dressing and chili. My husband with his new found passion for making bread made soft pretzels and cornbread as we hosted some of his family over for mother's day and fun. I wish I could take credit for my husband's bread baking skills, but I can't :) I'll have to recreate the meal at a later time so I can blog about it, but until then I'll reveal my love for cream cheese in cooking. I think anything with cream cheese is pretty much amazing, so one day I went online and bought this little guy:


Yes, you are reading your screen correctly. It is my cream cheese cookbook. As you can imagine it is not the healthiest of cookbooks, but it sure does create some good food. The date of the cookbook is clearly shown considering it asks to use margarine instead of butter in every recipe. Regardless, I love making food out of this cookbook. One of my favorite dinners to create is an alfredo sauce with pasta. I made this meal last Thursday, but have just found the time to blog about it! I had saved some leftover chicken from the whole bird I cooked last week, and cut it into smaller pieces.


I then cooked the entire meal in probably 20 minutes. It was so simple and so delicious :) Here is the final product.


INGREDIENTS:

1 pkg fettucine noodles
1 c. cooked chicken breast
1 8 oz pkg cream cheese (I use neufchatel to lower the calories)
3/4 c. grated parmesan cheese
1/2 c. margarine or butter
1/2 c. milk

DIRECTIONS:

1. Add noodles to boiling water and cook according to package instructions.
2. In large saucepan, combine cream cheese, parmesan cheese, margarine/butter, and milk. Stir over low heat until smooth. Add chicken to sauce.
3. Combine with noodles and serve.


Thursday, May 5, 2011

Mini-Meatloaves

Last night was another warm night for us, so what better way to commemorate the beginning of summer than to bake in my oven for another 45 minutes! Not exactly the best idea, but I managed w/ my trusty helper the box fan :)


 Last night upon several recommendations from all-recipes, I attempted the mini-meatloaves recipe. I loved the sauce that went over the top. It was sweet, but not overpowering as had been the case in meatloaves past. I was not as fond as the meat mixture. I admit that this was likely my fault. I used my version of "quick cooking oats", which is the all-too-amazing Coaches Oats from Costco. If you are a fan of oatmeal, that bag is the real deal. It tastes like steel-cut oats, but it's microwaveable (score!). Unfortunately, the taste was too rich for my meatloaf and made the loaf taste more "oatey" than I wanted. All in all it was a pretty decent recipe and I think I'll have to go buy the cheap oats next time I make it. I also think more cheese would be better as well, but I think I can say that about any recipe calling for cheese :) Mmmm....cheese! I do recommend the recipe, but don't do as I did and use the expensive oats, it tastes too authentic :)


Before
After


To avoid taking credit for preparing a recipe that someone else worked hard to create, I will share the link from which I obtained the recipe: http://allrecipes.com/Recipe/Mini-Meatloaves/Detail.aspx


INGREDIENTS

  • 1 egg
  • 3/4 cup milk
  • 1 cup shredded Cheddar cheese
  • 1/2 cup quick cooking oats
  • 1 teaspoon salt
  • 1 pound ground beef
  • 2/3 cup ketchup
  • 1/4 cup packed brown sugar
  • 1 1/2 teaspoons prepared mustard

DIRECTIONS
  1. Preheat oven to 350 degrees F (175 degrees C).
  2. In a large bowl, combine the egg, milk, cheese, oats and salt. Add the ground beef, mixing well, and form this mixture into eight miniature meatloaves. Place these in a lightly greased 9x13 inch baking dish.
  3. In a separate small bowl, combine the ketchup, brown sugar and mustard. Stir thoroughly and spread over each meatloaf.
  4. Bake, uncovered, at 350 degrees F (175 degrees C) for 45 minutes.

Wednesday, May 4, 2011

Lemon and Herb Whole Chicken

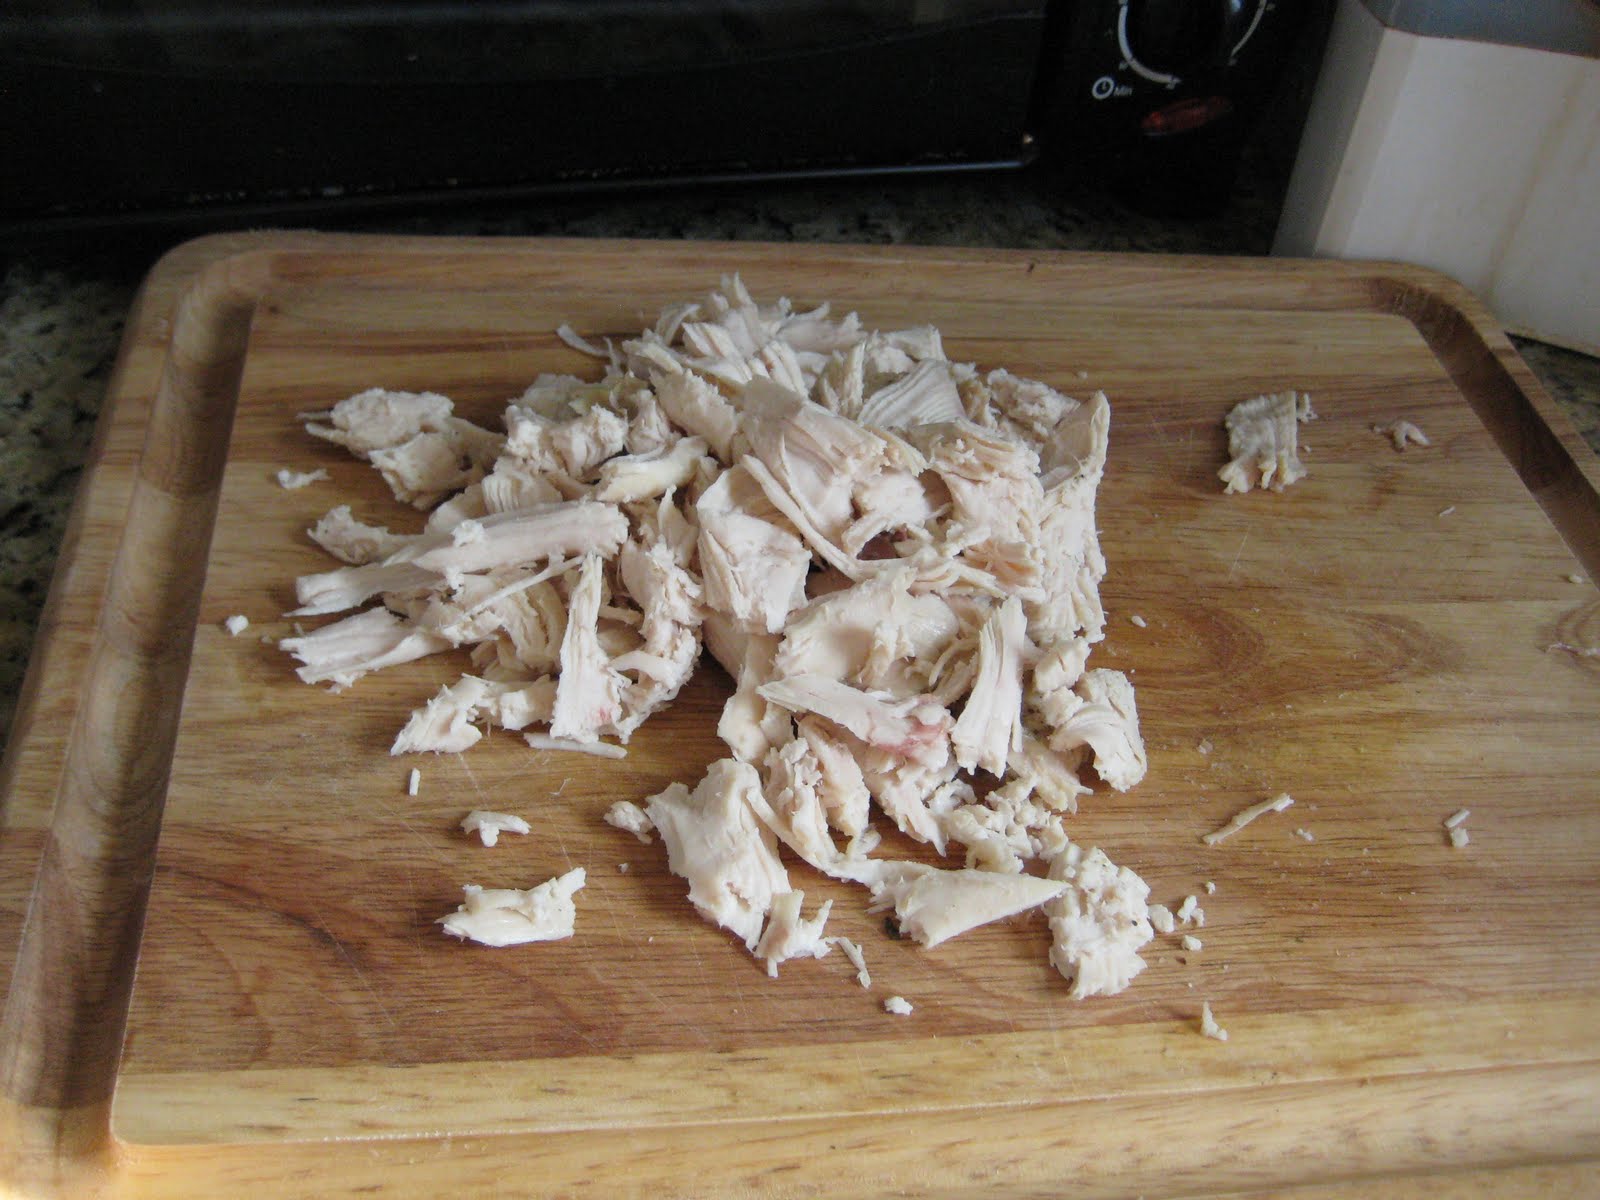
As a family of 2, we really cannot eat "family-sized" recipes. Regardless, I rarely cut down on the size of meal, because my husband enjoys bringing the leftovers to work that week. It really saves us a lot on money. Scaling back recipes usually causes more waste in the ingredients (i.e. not all the cilantro or lettuce were used). I know some people are not as fortunate to enjoy leftovers, but I'm grateful that my husband not only brings them to work, but even returns home saying his lunch was yummy :)

Last night, I chose to do a whole chicken in the oven. This meal was designed so that we could have dinner one night, leftovers for lunch, and I could use the rest of the chicken in a meal later on this week. Chickens were $0.75/pound at Stater Brothers last week so I really could not turn down that offer :)

Of course, the day I picked to make the chicken, it happened to be 90 degrees outside. With a non-working a/c, this was poor planning on my part. But, my husband- the engineer- devised a way that I could cook in the oven for hours at a time w/o heating the apartment to a sauna. In fact, I think it only increased the overall temp by 3-4 degrees. We own 2 box fans. In summer time, we run the box fans in our windows at night. I'm in charge of turning them off in the morning when the temperature outside rises. This keeps the apt cool for the majority of the day as long as it isn't 95+ outside. Well, fast forward to me cooking dinner in the oven at 375 for almost 2 hours and you will see how useful it is owning a box fan! I set up the fan to blow all the hot air from our oven out through a small window in the kitchen that I cracked open. This really helps remove the hot air from the kitchen w/o roasting me on the other side.


Also, needing its introduction into the blog is my dutch oven. I love this little guy. He was a Christmas gift from my mother-in-law. It's a great kitchen accessory. I literally only had to season my chicken, truss the legs, and then toss it in my dutch oven to cook w/ a roasting thermometer. I only checked the chicken after 1 hour and 45 minutes and it was already done! The dutch oven is a cast iron pot that can be used on the stove and the oven. It's usually used to prepare French dishes (which I have only done 2 since getting this guy at xmas!), but I have found that it cooks a chicken quickly and throughly.


Quick link to the dutch oven:  http://www.amazon.com/gp/product/B000N4WN08/ref=as_li_qf_sp_asin_il_tl?ie=UTF8&tag=httpyumyumsfo-20&linkCode=as2&camp=1789&creative=9325&creativeASIN=B000N4WN08

Wow, what an introduction. Now to the actual meat of blog (no pun intended). I made this lemon and herb chicken and it came out super moist! The meat was falling off the bone and delicious.

INGREDIENTS:
1 whole chicken (I used a 5.11 lb roasting chicken)
1/2 fresh lemon
4-5 shallots
1.5 tbsp salt
2 tbsp Mrs. Dash (or any other flavored seasoning you love: thyme, rosemary, black pepper...)

INSTRUCTIONS:
1. Preheat oven to 375 degrees.
2. Wash chicken throughly removing any giblets from body cavity.
3. Place chicken on clean surface and rub chicken with the juice of 1/2 of a lemon. Season chicken with salt and Mrs. Dash (don't forget to add a little to the inside!).
4. Chop shallots and place in cavity of chicken with used lemon wedge.
5. Truss chicken* and put the chicken with its wings tucked under its body in the dutch oven, add a roasting thermometer, and cover.
     a. Take chicken legs and wrap twine around one leg.
     b. Pull the two legs together and wrap the other leg in twine.
     c. Tie twine together in a knot, so that legs are close to the body of chicken and the stuffing of the chicken is contained in the body cavity.
6. Check chicken after about 1.5 hours. Chicken should be 170-175 in internal temp and should not contain any blood when cut.

All done! Bon Appetit!


* I'm lazy when I truss a chicken. Sometimes I see diagrams of chickens with zig-zags of strings to hold the wings and the legs together, but I found it is easier just to tuck the wings under the body to keep it cooking at about the same temperature and then trussing the two hind legs together. It was a method Julia Child used and one I will continue to practice because it makes life that much easier!

Monday, May 2, 2011

Biscottis- Tea and Coffee's Loyal Friend

So for anyone that knows anything about me, they know I have a deep love and appreciation for tea. Iced or hot, it all tastes delicious to me. I am primarily a black tea drinker (Stash teas Earl Grey Double Bergamott = yums for the tums!). So it is only fitting that with my love of tea, I really love cookies and cakes I can dip in tea. My all-time favorite would have to be Girl Scout Trefoils dipped :) but that would do a number on anyone's waistline, so I tend to stand clear of those polite girls in vests pushing those yummy cookies on me. Besides Trefoils, I also enjoy biscottis and scones. I think to those who do not appreciate tea or a classic cup of joe, the concept of a biscotti and scone is foreign. An extra hard cookie that isn't particularly sweet. That wouldn't sound tasty to anyone! But for those that do have caffeine addiction, I mean enjoy hot beverages, a biscotti is a welcome treat. I attempted (and I believe successfully so) to create this yummy treat for my morning, afternoon, and evening tea. Did I mention I really love tea?

INGREDIENTS:
2.5 tbsp butter
1/3 c sugar
1 egg
1/2 tsp vanilla extract
1/8 tsp almond extract
1 tsp fresh orange zest
1 c all-purpose flour
3/4 tsp baking powder
1/8 tsp ground nutmeg
1/8 tsp salt
1/2 c semisweet chocolate chips
1/4 c almond pieces (optional)

DIRECTIONS:
1. Preheat oven to 325 degrees. Grease and flour one large baking sheet.

2. In a mixing bowl, combine butter and sugar whisking until light and fluffy. Beat in eggs, vanilla, almond extract, and orange zest. Combine flour, baking powder, nutmeg, and salt. Stir into the creamed mixture until just blended. If desired, add almond pieces and mix. Divide dough into two, equal pieces. Form into long flat loaves about 1/2 inch tall and 12 inches long. Place the loaves on the baking sheet.


All the ingredients for Biscotti success. And shamefully, no I do not own a zester :(


In the oven. Looking appetizing right? j/k


3. Bake in preheated oven for 25 minutes, or until light golden brown. Cool on a wire rack for 5 minutes.


4. Using a serrated knife, cut diagonally into slices about 1/2 inch thick. Lay flat on baking sheet and bake for 10 minutes turning over once. Transfer biscotti to wire rack for cooling.

5. Place chocolate chips in metal bowl over bowling water (creating a double boiler) and melt chocolate. Using a spatula, spread chocolate over biscotti in desired pattern or area. Let biscotti cool to room temperature and store in air tight container.


The final product! Perfect tea or coffee.